REVIEW · HONOLULU
Makapu’u Lighthouse Trail and Shuttle Service
Book on Viator →Operated by Kaimana Tours · Bookable on Viator
Whales show up near a lighthouse hike. It’s an easy-to-plan Oahu outing with round-trip shuttle and a paved Makapu’u trail where you set your own pace. You also stop at Halona Blowhole for big wave drama and photos, all without the stress of finding parking.
Two things I really like: the Makapu’u Lighthouse Trail is paved, so the walk feels straightforward even when it’s uphill, and you get a whale-watching bonus in the season from November through April. The Halona Blowhole stop also turns the trip into more than just a single viewpoint.
One drawback to note: you can’t go inside the lighthouse itself, since it’s an active aid to navigation. You’re there for the surrounding views and coastline photos, not for a lighthouse visit.
In This Review
- Key things to know before you go
- Makapu’u in one shot: shuttle, blowhole, and a self-guided hike
- Waikiki pickup and logistics that matter in real life
- Halona Blowhole: the ocean’s special effects before the hike
- Makapu’u Lighthouse Trail: paved views, steady climb, and great photo angles
- Whale spotting on Oahu’s windward side: November to April
- What’s included in the $38.99 price and where the value comes from
- Timing tips: how to make the most of your hike window
- Who this fits best, and who should rethink it
- Should you book the Makapu’u Lighthouse Trail and Shuttle Service?
- FAQ
- How long does the Makapu’u Lighthouse Trail and shuttle take?
- What stops are included on the route?
- Is the hike self-guided or guided?
- How long is the trail hike and what is it like?
- Can you enter the lighthouse?
- Are whales part of the experience?
- What’s included in the price?
- FAQ
- Do I get a refund if I cancel?
Key things to know before you go
- Waikiki shuttle + National Park fees included means fewer add-ons on arrival
- Halona Blowhole photo stop gives you ocean spray drama before the hike
- Self-guided 2.5-mile paved trail lets you move slower or faster without pressure
- Whale spotting window is real (November through April), especially from lookout points
- Small group size (max 14) keeps the ride and stops calmer than big tours
Makapu’u in one shot: shuttle, blowhole, and a self-guided hike
This is a smart way to do Makapu’u without turning your day into a car-searching scavenger hunt. You start with transportation from Waikiki, then you get a quick stop at Halona Blowhole, and finally you’re dropped off for the Makapu’u Lighthouse Trail. The big win is that you hike at your own pace. No waiting in a line for the group to catch up, no rushing because you’re “supposed” to be at the next viewpoint.
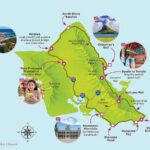
What makes it feel special is the mix of scenery types in one outing. You get a dramatic coastline stop first, then you hike along a route built for views: Koko Head in the background, Rabbit Island nearby, and the open Pacific stretching out for miles. On clear days, you may even catch sight of Moloka‘i and Lana‘i, which makes the photos feel more “place-specific” instead of just generic ocean shots.
You can also read our reviews of more tours and experiences in Honolulu.


Waikiki pickup and logistics that matter in real life
The shuttle makes a big difference if you don’t want to deal with parking near popular trailheads. You’re picked up in Waikiki using a mobile ticket, and the driver has multiple stops, so you shouldn’t assume you’ll be first or last.
Here’s what you need to do to avoid problems:
- Be outside at your assigned hotel pickup spot, and give a 5–10 minute arrival window.
- Don’t show up late. The shuttle won’t wait for tardy arrivals.
- If you’re not staying in Waikiki, there’s a free parking lot at 2805 Monsarrat Ave, Honolulu, HI 96815. Park there and walk to the Queen Kapiolani Hotel for pickup.
After booking, you’re asked to contact Kaimana Tours to confirm your pickup location and time. If you’re an international traveler without a U.S. mobile number, you’ll need to provide your hotel room number, since they try to reach you about 24 hours before. This is one of those details that seems small until you’re standing there wondering why the shuttle didn’t come.
Good to know: drivers and reception may speak Portuguese as well, which can be helpful if you’re more comfortable in that language.
Halona Blowhole: the ocean’s special effects before the hike
Before you even touch the trail, you’ll stop at Halona Blowhole. This is where you’ll see the coastline do its best impersonation of a movie set: waves hitting rock, water shooting upward, and lots of dramatic spray for photos.
Timing is everything here. If the ocean is active, this stop can look almost unreal. If it’s calmer, it still gives you a great coastal viewpoint and a chance to stretch before the hike begins.
Practical tip: treat this like your warm-up. Use the stop to get your camera settings sorted, take a few photos with the horizon line, and then head to Makapu’u with fewer things competing for your attention.
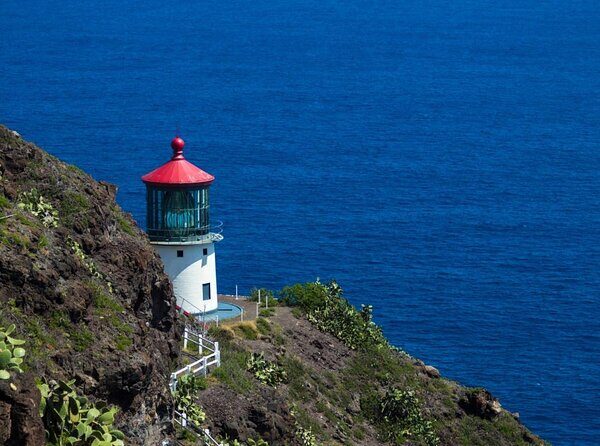
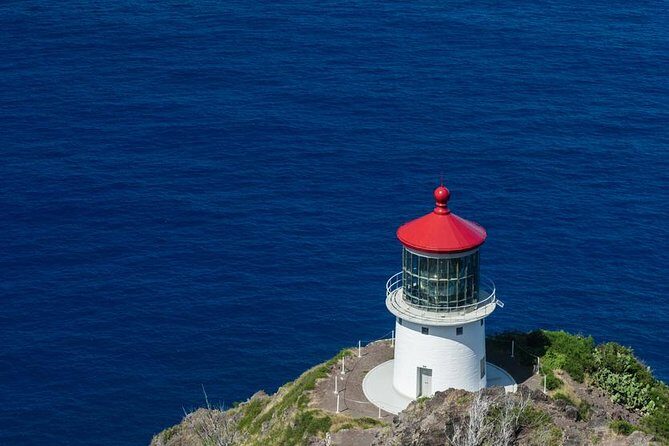
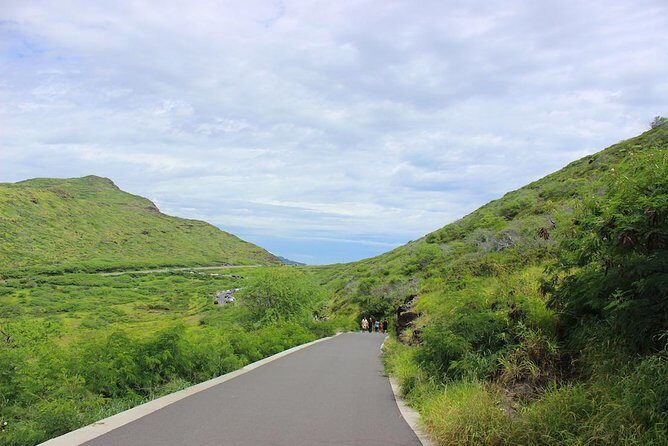
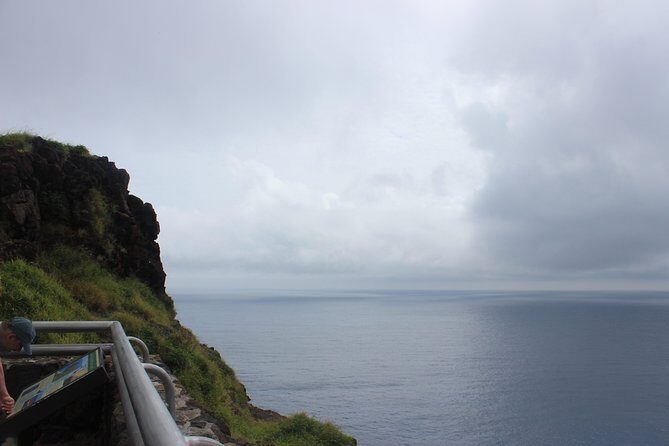
Makapu’u Lighthouse Trail: paved views, steady climb, and great photo angles

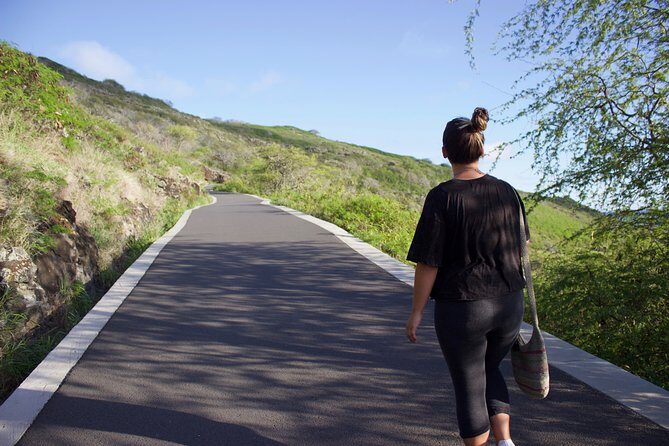
This is the main event: a self-guided hike on a 2.5-mile route with paved paths and moderate elevation. In plain terms, it’s not a rough trail, but it is not flat. You’ll feel the effort. One review described it as an all-up climb that turns into a pleasant downhill on the way back, which matches what most people experience on this route.
A few things to keep in mind:
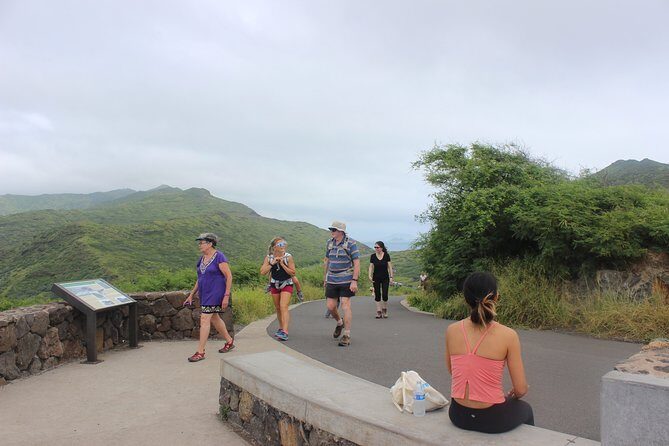
- The surface is paved, so it’s easier on footing than many hiking trails.
- Expect a gradual climb with multiple photo opportunities along the way.
- People have described the angle as steep in stretches, so if you have knee or back issues, take that seriously.
You’ll reach viewpoints with sweeping ocean views and the lighthouse area in sight. You’ll also learn quickly that the lighthouse is mostly a view landmark. You can take photos of it, but you cannot go into the lighthouse or access the interior path. That limitation is easy to accept once you’re up there looking at the coastline from the trail’s vantage points.
One useful detail from the experiences people shared: having the shuttle reduces the stress of trailhead logistics. Parking near popular spots can be tough, and this tour solves that. Even if you’re comfortable driving, paying attention to time spent searching for a spot can make the shuttle feel like better value.
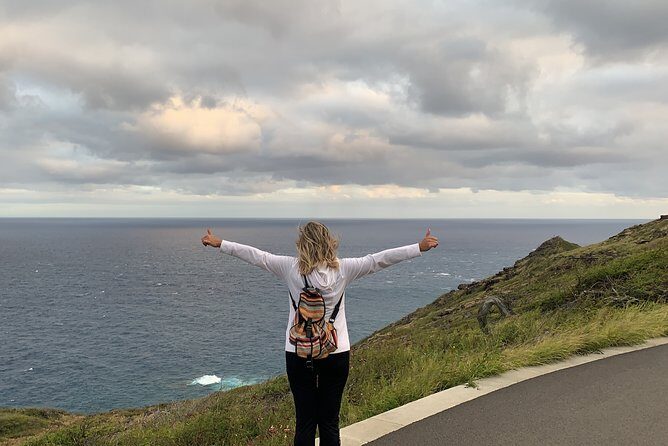
Whale spotting on Oahu’s windward side: November to April
If you’re traveling during the whale season, this tour can feel extra alive. From November through April, you’ll have the chance to watch for humpback whales breaching, spouting, and moving along the windward waters. Makapu’u is one of the well-known places for this kind of spotting, and the route includes lookout points where you can pause and scan.
A tip that comes up more than once: bring binoculars. With distance and ocean glare, binoculars help you catch the action sooner and track where the whale is going next.
Also, don’t assume it’s guaranteed. You might see whales close, or you might only spot a distant spout. Either way, the views from the trail are still the point, so you’re not gambling everything on wildlife showing up.


What’s included in the $38.99 price and where the value comes from
Let’s break down what you’re actually paying for: $38.99 per person buys you
- Round-trip shuttle from Waikiki
- A stop at Halona Blowhole
- Access to the Makapu’u Lighthouse Trail as part of the timed experience
- National Park fees included
- Bottled water
That bundle matters when you compare it to DIY. Yes, Waikiki to this area is relatively quick by car, and some people do fine just driving themselves. But the value of this tour is that it covers the hard-to-replicate parts for many visitors: parking hassle, routing logistics, and getting you there and back on schedule.
Bottled water might sound minor, but on a sun-baked hike with ocean breeze, hydration is still hydration. And when you’re hiking at your own pace, having water ready removes one more task.
If you already have a rental car and you’re confident with driving and parking, you could arguably do the sights on your own for less. Still, the shuttle is usually worth it if you’d rather trade problem-solving time for viewpoint time.
Timing tips: how to make the most of your hike window
This outing is about 4 hours (approx.) total, and your pace is your choice once you’re on the trail. Even so, timing affects your experience.
A few practical pointers:
- Start earlier in the day if you want a calmer feel on the trail. One reviewer specifically recommended going early.
- Build in extra camera pauses. The viewpoints come often, and the lighthouse photo angle can take a few attempts.
- Use the time on the route to catch both ocean views and wildlife scanning from lookouts.
Weather is another factor. This is a hike experience that depends on conditions. If weather is poor, the tour can be canceled due to weather, and you’ll be offered a different date or a full refund.
If it rains, the trail can get tricky. One person described muddy patches and small stones, so if you’re hiking in wet conditions, watch your footing and slow down where needed.
Also, sunscreen and a hat are smart. People have noted taking a hat to cover from sun, especially on exposed sections.
Who this fits best, and who should rethink it
This tour is a good fit for people who want a scenic coastal hike without heavy trail challenges. The hike requires moderate physical fitness, and it’s not recommended for:
- Children under 3
- People with disabilities
- Ages older than 65 (they do not recommend it for this age group)
If you’re generally mobile but have a sensitive knee or back, I’d treat this as a “consider carefully” hike rather than a guaranteed comfortable one. One review pointed out that the climb is longer and steeper than some people expect.
On the upside, the trail being paved makes it more approachable than many hikes, and the return downhill can feel easier once you’ve reached the top.
This is also a solid choice for a port day in Honolulu because the schedule is clear and the day doesn’t sprawl into an all-day mess.
Should you book the Makapu’u Lighthouse Trail and Shuttle Service?
You should book if you want the famous Makapu’u views with a stress-free setup: shuttle from Waikiki, Halona Blowhole stop, and a paved hike you can pace yourself. The whale possibility in winter adds extra payoff when conditions line up.
You might skip it if you’re looking for a true lighthouse visit (you can’t go inside) or if you know you struggle with steady uphill climbs. And if you’re the type who loves DIY logistics and you’re already comfortable parking and driving, you could probably replicate the plan yourself.
If you’re deciding, here’s my simple rule: if you want a smooth, scenic, no-parking headache morning with real viewpoints, this one is a good deal for Honolulu.
FAQ
How long does the Makapu’u Lighthouse Trail and shuttle take?
It’s about 4 hours total, approximately.
What stops are included on the route?
You’ll stop at Halona Blowhole first, then head to the Makapu’u Point Lighthouse Trail.
Is the hike self-guided or guided?
The Makapu’u Lighthouse Trail portion is self-guided.
How long is the trail hike and what is it like?
The hike is about 2.5 miles on paved paths with moderate elevation.
Can you enter the lighthouse?
No. You can view the lighthouse area, but you cannot go into the lighthouse itself.
Are whales part of the experience?
From November through April, you may spot humpback whales at the lookout points.
What’s included in the price?
National Park fees are included, and bottled water is provided.
FAQ
Do I get a refund if I cancel?
Yes. You can cancel up to 24 hours in advance for a full refund, and weather-based cancellations may offer a different date or a full refund.