REVIEW · HONOLULU
Oahu Island Photography Tour
Book on Viator →Operated by Blue Hawaii Photo Tours · Bookable on Viator
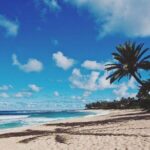
Oahu looks different through a camera lens. This is a full-day, small-group photo workshop that mixes pro-level shooting guidance with real island stops, from Waikiki out to the North Shore and winter surf energy. Two things I really like: you get specific instruction for both smartphones and cameras, and the day is structured around varied locations that force you to practice composition, light, and motion.
The one catch is that lunch costs extra, and you’ll need to bring your own phone or camera (tripods are provided). Plan on a long day too, since you’re out roughly 8 to 8.5 hours.
You’ll start with a hotel pickup in an air-conditioned van, then work with a professional guide (for example, Jenny, Evan, Marie, Pattie, and Jason show up as guide names tied to this tour experience) who blends photography coaching with Oahu storytelling. The vibe is relaxed, not stuffy, and it’s very built for learning on the move.
In This Review
- Key takeaways before you go
- Why This Tour’s Waikiki Start Matters
- Coaching That Actually Changes Your Photos
- Tripods, Cameras, and the Beginner-Friendly Setup
- The Drive Out: Using Oahu’s Geology for Better Shots
- North Shore Winter Surf: Motion, Impact, and Timing
- Wildlife and Sacred Sites Without Making It Weird
- Time on the Clock: Lunch, Breaks, and Staying Comfortable
- Price and Value: What $150 Gets You (and Why It Adds Up)
- Who This Tour Fits Best
- Final Call: Should You Book This Oahu Photo Workshop?
- FAQ
- Where does the tour start and end?
- How long is the Oahu photography tour?
- What photo gear do I need to bring?
- Is the tour good for beginners?
- Does the tour go to the North Shore?
- What wildlife might I see?
- What’s the cancellation/refund rule?
Key takeaways before you go
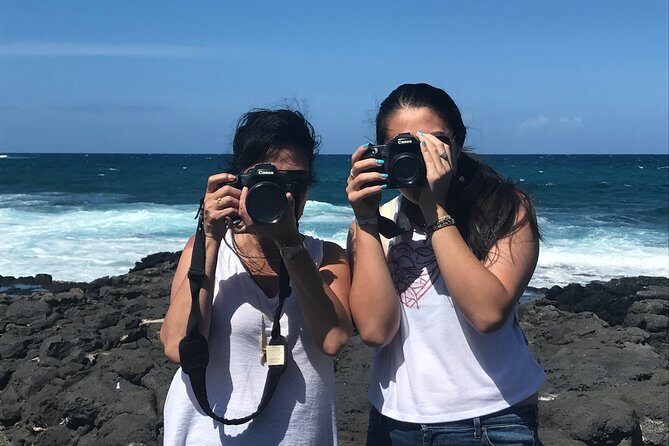
- Small group = real help: capped at about 6 travelers (and also listed as up to 7 per booking).
- Instruction for phones and DSLRs: you’ll get practical settings and framing tips, not just scenery stops.
- Tripods included: you can set up steadier shots without hauling your own gear.
- North Shore winter surf is the payoff: dramatic motion and big-wave visuals, especially in season.
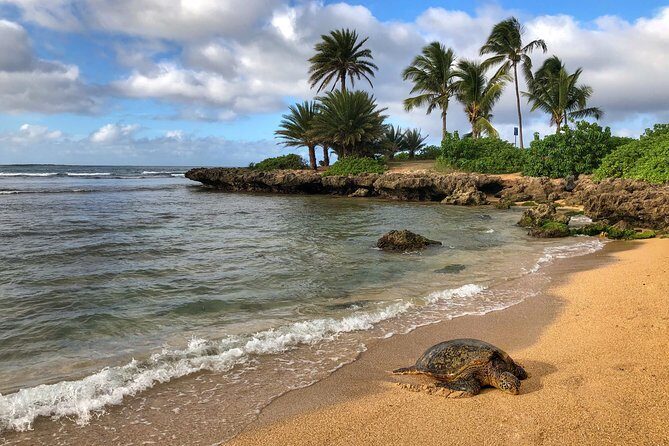
- Wildlife spotting is part of the mix: you may look for monk seals and green sea turtles.
- Lunch is on you: plan for a North Shore break with food you choose.
Why This Tour’s Waikiki Start Matters
Most Oahu tours start with a checklist. This one starts with you getting ready to see.
Pickup runs from Waikiki in a spacious, air-conditioned van. That matters because your first hour is not wasted waiting in traffic or scrambling to find meeting points. You’re already in motion, which keeps the day feeling like a workshop, not a bus ride.
It also sets you up to understand Oahu as a photo subject. You’ll hear about what you’re about to shoot as the scenery changes, including hints of ancient volcanoes, lush rainforest, surfing beaches, and sacred sites. That gives you a mental framework so your camera stops being automatic.
You can also read our reviews of more photography tours in Honolulu

Coaching That Actually Changes Your Photos
The best part is the way the guide connects photography concepts to what you’re standing in front of.
Throughout the day, you’ll get pointed tips on light and composition, plus what things like framing, shutter speed, focal points, and other camera ideas mean in real-world terms. If you’re using a smartphone, the focus still stays practical: you’ll be given phone-specific guidance and ways to get better results with what you have.
This is where the small-group size shows. With fewer people around, you can ask questions and get adjustment suggestions on the spot—especially when conditions shift. One review example that matches the tour style: if the morning turns cloudy, the guide still drives you to the right spots and helps you keep getting good frames rather than just shrugging and waiting for sunshine.
Also, your guide brings more than camera talk. The tour description references an island-naturalist angle—wildlife, geography, and Oahu context alongside photography. So when you’re taking a shot, you’re also learning why the scene matters.
Tripods, Cameras, and the Beginner-Friendly Setup
You don’t have to show up with pro gear to enjoy this. You do need one thing: your own device.
Tripods are included, which is a big deal for value if you don’t own one. Steadier support helps you with sharp landscapes, calmer water shots, and night or low-light attempts if the light allows. It also helps you slow down and think about framing instead of chasing focus.
The tour is designed for all skill levels, from beginner to advanced. That means the guide can explain the basics (how to set up, how to expose, how to frame) while also offering deeper tips if you’re comfortable with manual settings. It’s built for smartphones too, so you’re not locked out if you don’t want to carry a DSLR.
One practical consideration: if you’re hoping for a single specific shot (like a waterfall every time), the schedule and day’s conditions control what’s possible. Some people want more time at one subject; the tour keeps momentum and covers multiple locations.
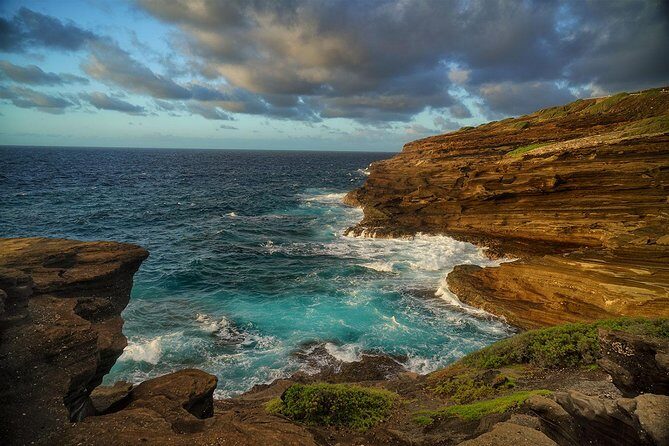
The Drive Out: Using Oahu’s Geology for Better Shots
This isn’t just a sightseeing itinerary. The route is basically a photography exercise in variety.
Expect changes in terrain and subject: coastal vistas, dramatic valleys, rainforest textures, and sacred sites like heiaus. Even when the exact stops can vary by day and time of year, the goal is consistent: give you different “photo problems” to solve.
Here’s how that helps you as a photographer:
- Coastal views teach you how to handle horizon lines and bright glare.
- Water and ocean scenes teach shutter speed and timing for motion.
- Forest and waterfall-type lighting (when you find it) pushes you toward different exposure choices.
- Sacred sites teach framing—how to include context without turning the shot into a random pile of structures.
The tour style encourages you to look for angles you would miss on your own, especially when you’re moving quickly between environments.
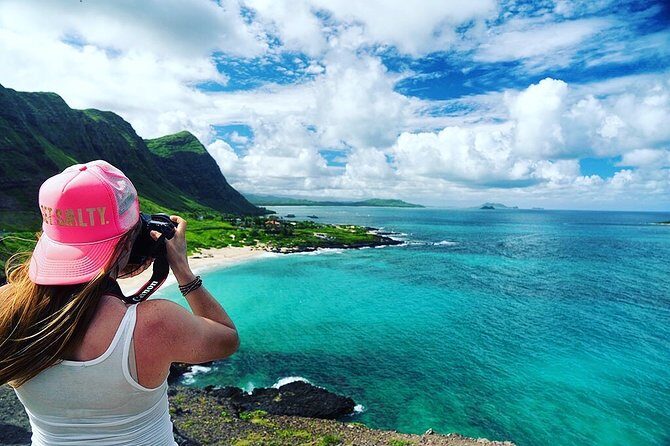
North Shore Winter Surf: Motion, Impact, and Timing
If you’re visiting in the winter season, the North Shore is where the photos get dramatic.
The highlights specifically call out famous winter surf beaches on the North Shore, and the winter focus includes big waves and surfers. This is prime territory for shutter speed decisions, burst timing (or the smartphone equivalent), and learning how to keep action sharp while still conveying speed.
Even outside perfect conditions, this part of the day is built for visual payoff. The motion and scale are hard to fake, and a guide can point out where to position yourself for the best mix of subject and background.
One thing I’d plan for: this section of the day can mean bright sun, spray, or cloudy skies depending on the day. Bring sunscreen and a hat. Wear shoes you can walk in comfortably, because you’ll likely be stepping around for better angles.


Wildlife and Sacred Sites Without Making It Weird
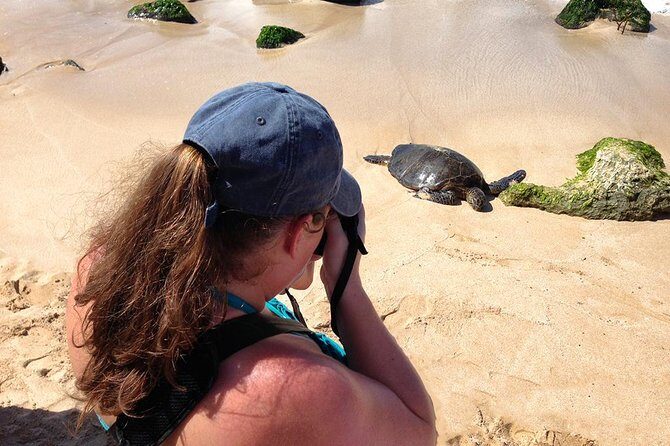
Oahu’s wildlife shows up in the tour plan, but you shouldn’t treat it like a guaranteed pickup from a vending machine.
The tour notes possible sightings of Hawaiian monk seals and green sea turtles. In practice, wildlife viewing is about watching patiently and positioning safely. The guide’s job is to help you spot and frame what you’re allowed to see, while keeping you moving toward the next best photo opportunity.
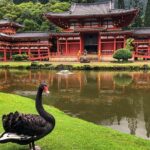
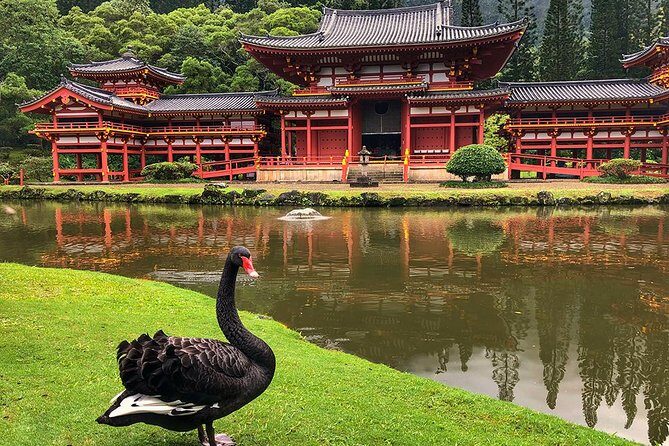
You’ll also cover sacred sites. The tour description mentions heiaus, and one review example talks about a cave-marked hillside where royalty was often buried, explained as part of the island’s story. That kind of context matters because it changes how you photograph the place. Instead of treating it like a background, you start thinking about respectful framing and meaningful composition.
Time on the Clock: Lunch, Breaks, and Staying Comfortable

This is a full day. You’re looking at about 8 hours on the schedule, with one reference to 8.5 hours in the tour description.
There’s a lunch break around halfway through the tour, and it’s on the North Shore. Lunch is own expense, so you should decide how you’ll handle that before the day starts. Bring money/cards you can use easily and consider a light snack before pickup if you’re sensitive to waiting.
Some days also add a fun food stop beyond the basic lunch moment. One guest mentioned an unexpected coffee roasting facility stop for an afternoon snack, which fits the tour’s style: keep the day flowing and add local flavor when there’s a natural break.
Comfort tips that actually matter here:
- Wear closed-toed walking shoes.
- Bring a hat and sunscreen.
- Dress for weather, because the tour operates in all weather conditions.
Price and Value: What $150 Gets You (and Why It Adds Up)
$150 per person sounds steep until you match it to what’s included and what you’d otherwise have to build yourself.
Included in the price:
- Hotel pickup and drop-off in Waikiki
- A professional guide
- Tripods
Not included:
- Lunch
- Camera
So what’s the real value? You’re paying for a full-day route plus expert instruction in the moments when your learning sticks. If you’ve ever tried to “learn photography” by watching YouTube and then wandering alone, you know what’s missing: someone who can point at your exact mistake and connect it to a technique.
The small group size helps too. With fewer people, your questions aren’t competing with everyone else’s. That’s why the instruction angle is repeatedly praised—people aren’t just getting pretty stops; they’re getting guidance they can use right away.
If you’re the kind of person who wants to return with images you’re proud of, this is a strong use of time in Oahu. And if you’re using a smartphone, the tripod and coaching combo can feel especially fair because you’re not forced to buy fancy gear just to benefit.
Who This Tour Fits Best
This tour fits best if you want structured learning with real Oahu scenery, without the pressure of running your own photo chase.
It’s a great match for:
- Beginners who want the basics explained in plain language
- Intermediate photographers who want hands-on tips for light and motion
- Smartphone shooters who want better settings and framing strategies
- Anyone visiting for the first time who also wants cultural context
It may be less ideal if:
- You only want one subject type (like exclusively waterfalls or exclusively portraits)
- You’re hoping for unlimited time at each location
- You hate walking and stepping around for angles (you’ll be on your feet)
Final Call: Should You Book This Oahu Photo Workshop?
I’d book it if your goal is better photos plus a smarter way to see Oahu. The mix of small-group teaching, tripods provided, and North Shore winter surf potential makes the day feel like a workshop that still delivers real island drama.
If your expectations are flexible and you show up ready to practice, you’ll leave with images plus technique you can reuse back home. If you’re very specific about capturing a narrow set of shots, consider that the tour balances many kinds of scenes and adapts to conditions.
Either way, this is one of the more practical ways to turn a sightseeing day into real photographic progress.
FAQ
Where does the tour start and end?
The experience starts in Waikiki with hotel pickup in the morning and ends with a hotel drop-off in Waikiki.
How long is the Oahu photography tour?
It runs about 8 hours (and the description also notes a full-day length around 8.5 hours).
What photo gear do I need to bring?
You need to bring your own camera or smartphone. Tripods are included.
Is the tour good for beginners?
Yes. The tour is designed for all skill levels, from beginners to advanced photographers, and it works with both smartphones and higher-end cameras.
Does the tour go to the North Shore?
Yes. The route includes stops with famous winter surf beaches on Oahu’s North Shore, depending on the day and time of year.
What wildlife might I see?
The tour mentions possibilities like Hawaiian monk seals and green sea turtles, and the guide helps you look for these when conditions allow.
What’s the cancellation/refund rule?
Free cancellation is available up to 24 hours in advance for a full refund. If you cancel less than 24 hours before the experience starts, the amount you paid is not refunded. The tour may also offer a different date or a full refund if it’s canceled due to poor weather.